
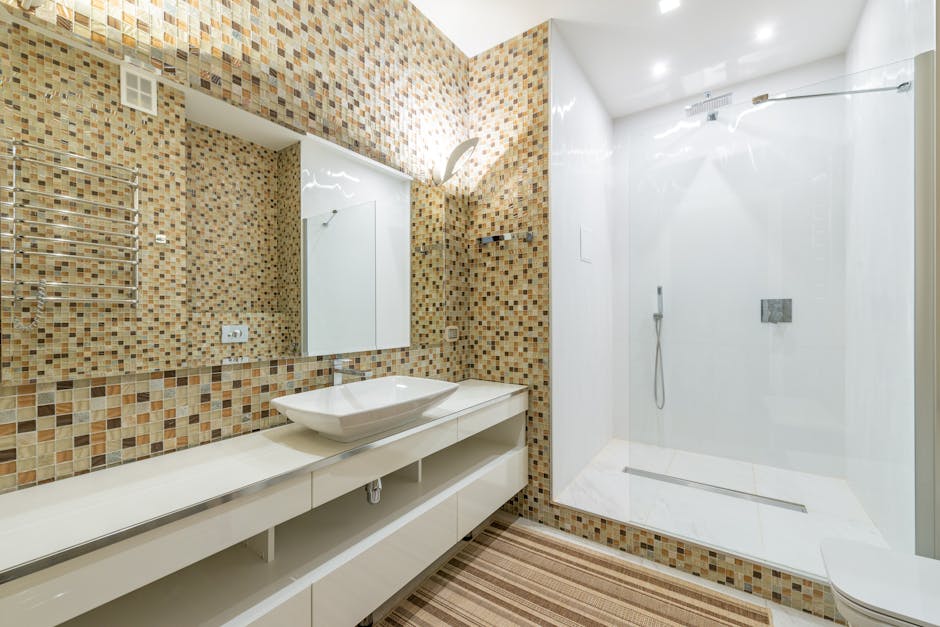
Laying ceramic tile in a bathroom can transform your space into a sleek and durable sanctuary. If you’re tired of outdated floors and want a fresh, modern look, ceramic tiles might be the perfect solution.
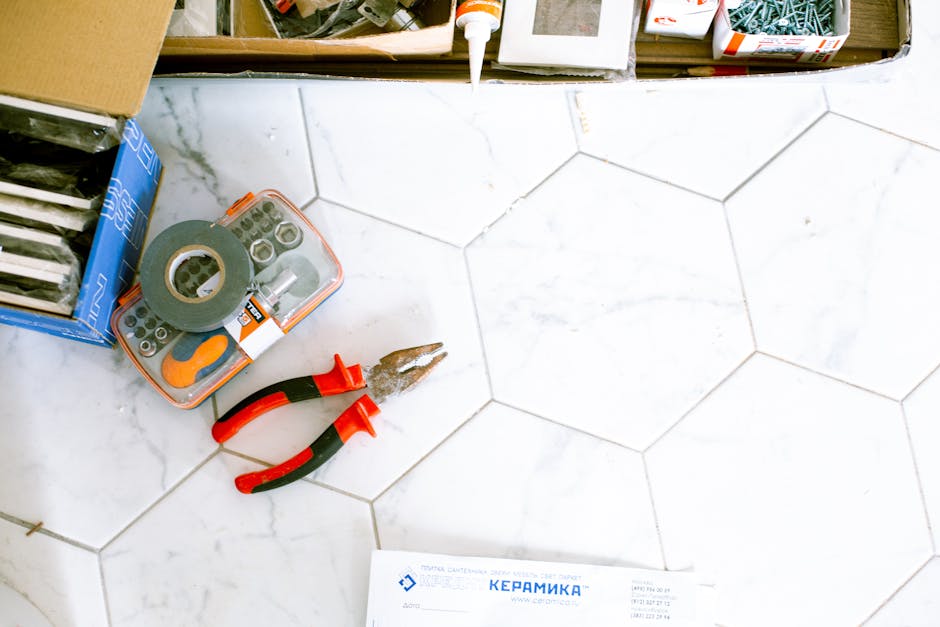
Here’s a quick rundown of the steps:
- Gather essential tools and materials.
- Prepare the site, including removing old tiles.
- Plan your tile layout.
- Set and secure the tiles.
- Grout and seal the tiles.
Laying ceramic tile is a fantastic DIY project that improves both the appearance and longevity of your bathroom. It’s often more affordable than hiring a professional, and you get the satisfaction of creating beautiful results yourself. Imagine stepping into your newly tiled bathroom, where every tile you laid contributes to a pristine and functional space.
Why Aqua Gleam Bathrooms?
Aqua Gleam Bathrooms has a decade of expertise in home improvements, ensuring you get only the best advice and tools needed for outstanding results. Whether you need tips, tiles, or a complete bathroom overhaul, they’ve got you covered.
Tools and Materials Needed
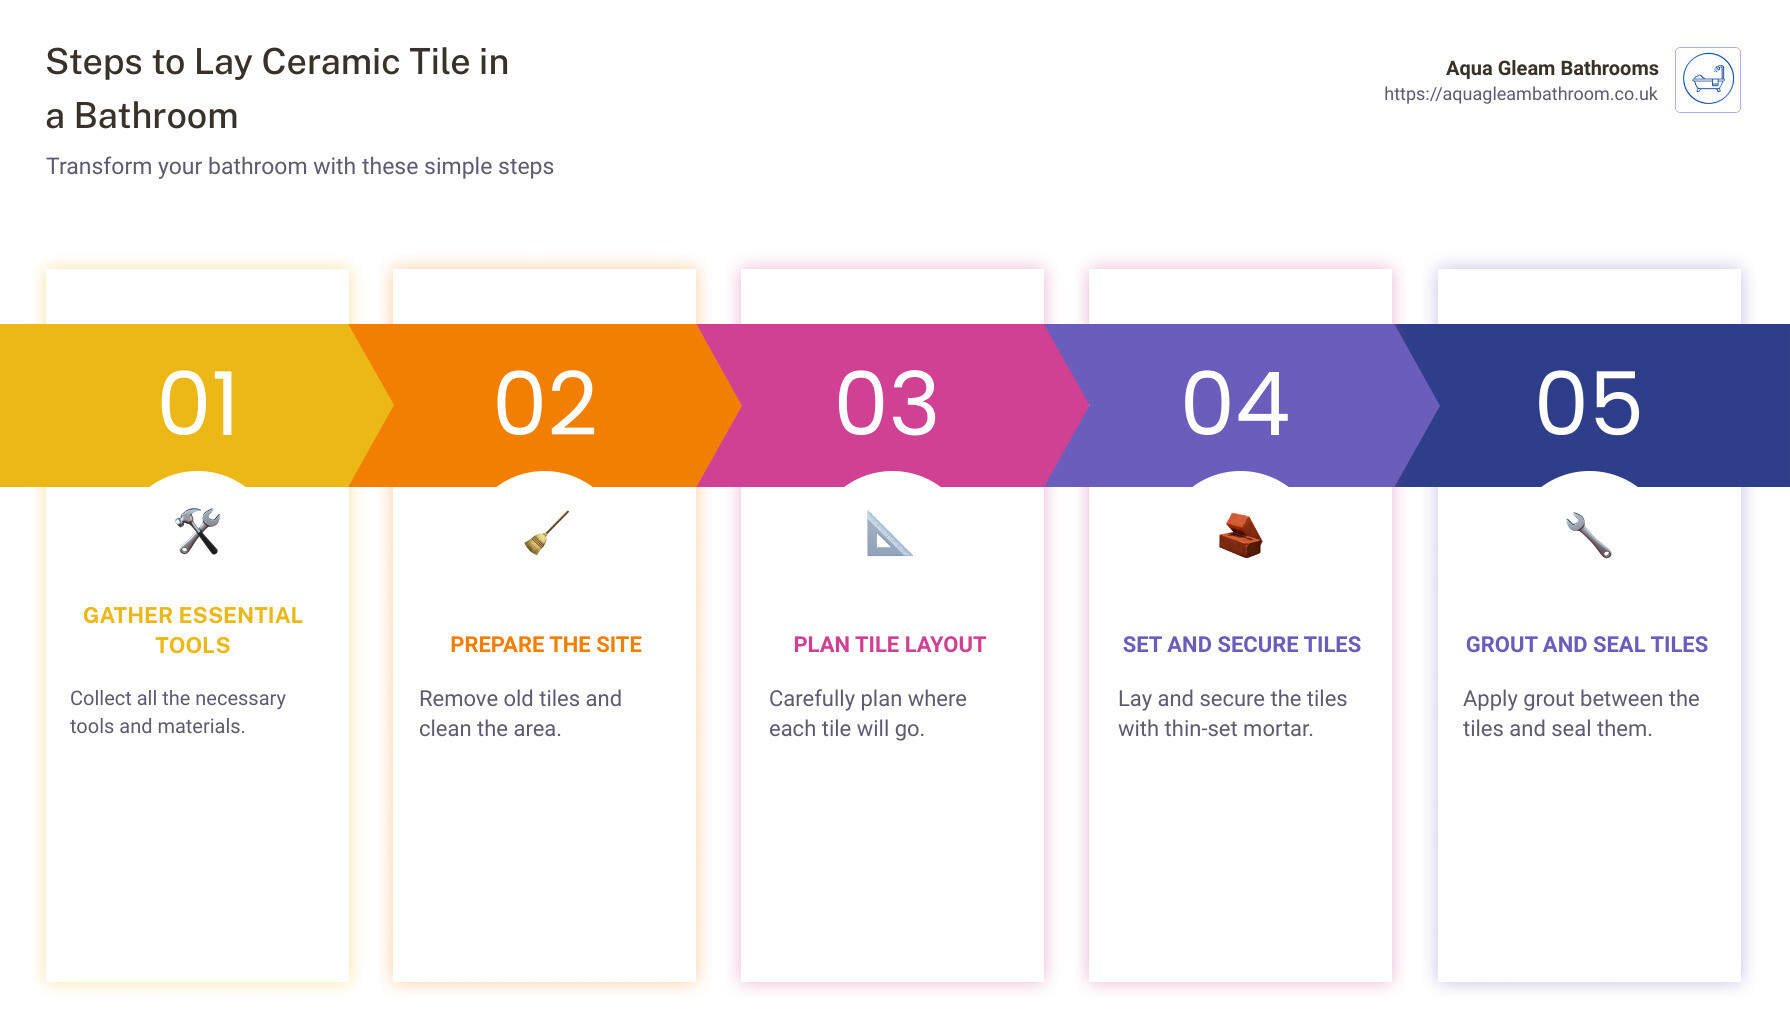
Before diving into laying ceramic tile in a bathroom, it’s crucial to gather the right tools and materials. Proper preparation ensures a smooth and efficient tiling process.
Essential Tools
Having the right tools at your disposal is key. Here’s a list of the essential tools you’ll need:
- Diamond Blade and Angle Grinder: For cutting tiles, especially around tricky spots.
- Bucket and Drill Mixer: To mix your thin-set mortar or tile adhesive.
- Caulk Gun and Chalk Line: For precise application of caulk and marking straight lines.
- Cordless Drill and Drywall Saw: For making holes and cuts in backer boards.
- Dust Mask and Safety Glasses: To protect yourself from dust and debris.
- Grout Float and Margin Trowel: For applying grout and maneuvering in tight spots.
- Knee Pads and Nippers: To keep you comfortable and help with small cuts.
- Notched Trowel and Offset Saw: For spreading mortar and making angled cuts.
- Putty Knife and Scoring Knife: For scraping and scoring tiles.
- T-Square and Tape Measure: For ensuring straight lines and accurate measurements.
- Tile Cutter and Utility Knife: For cutting tiles to size.
- Wet Saw: For precise and smooth tile cuts.
Materials Required
Along with tools, you’ll need specific materials to ensure a durable and professional finish:
- Stainless Steel Screws and Galvanized Screws: For securing backer boards.
- Tile Backer Board and Guide Boards: To provide a stable base for your tiles.
- Acrylic Additive and Alkali-Resistant Mesh Tape: To improve the mortar’s performance and reinforce joints.
- Backer Board Screws and Backer Rod: For securing and filling gaps.
- Construction Adhesive and Duct Tape: For bonding and holding pieces in place.
- Sanded Caulk and Sanded Grout: For filling joints and ensuring a smooth finish.
- Silicone Caulk and Thin-Set Mortar: For waterproofing and adhering tiles.
- Toilet Extension Ring and Transition Threshold: For fitting around existing fixtures.
- Wax Ring: To install under the toilet for a watertight seal.
Ensure you have all these items ready before starting your project. This preparation will save you time and prevent any mid-project hiccups.
Next, we’ll dive into preparing your bathroom for tile installation, including site prep and removing existing tiles.
Preparing Your Bathroom for Tile Installation
Removing Existing Tiles
Before you can start laying ceramic tile in a bathroom, you need to prepare your site. This means removing any old tiles, linoleum, or other flooring. If you’re tiling a wall, remove any wallpaper too.
Start by completely stripping your bathroom of any existing tiles. If there’s a loose tile, your job is easier—use a chisel to pry it out. If not, you’ll need to break one to get started. Once one tile is out, you can access the gaps around the rest and chisel them out. Remove the old tile adhesive in the same way.
To ensure a clean surface, scrub the floor with a vinyl floor stripper using an abrasive pad. This will dissolve wax and other residues, leaving microscopic scratches that help the mortar bond better.
Assessing Your Floor
Once your bathroom is stripped of old tiles, it’s time to assess the subfloor. This step is crucial for a successful tile installation.
Determine Tile Quantity
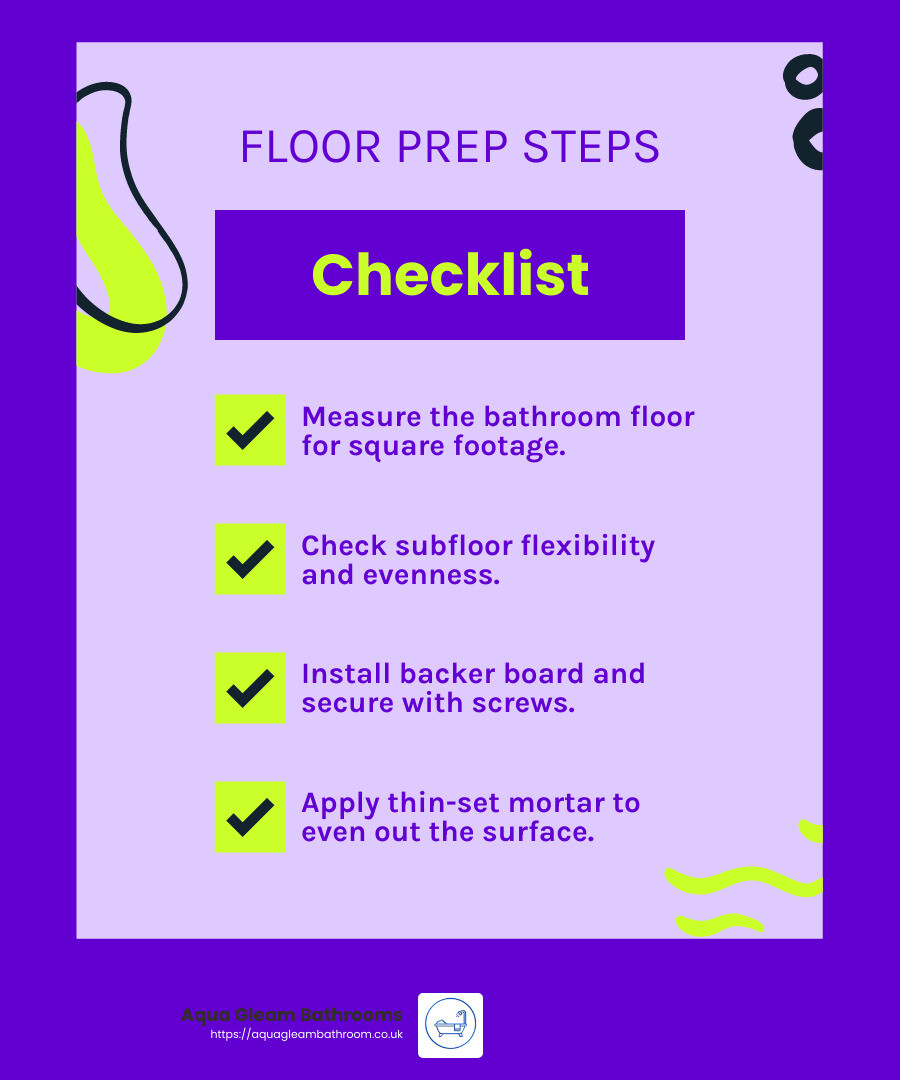
First, measure your bathroom floor to calculate the square footage. Multiply the length and width, then add around 15% extra for mistakes and spare tiles.
Check Subfloor Flexibility
If your subfloor is flexible or uneven, you’ll need to lay a backer board to make it firm enough for the tiles. If there are uneven areas, you can fill these with thin-set as you go.
Install Backer Board
Cover the entire floor with a backer board. Use a saw to cut any necessary shapes, ensuring pieces fit properly before vacuuming the space to make it dust-free. Secure the backer board with screws, ensuring they are driven into the floor joists for stability.
Apply Thin-Set
Mix your thin-set or prepare your bathroom tile adhesive. Spread it over the floor using a notched trowel, working in small sections to avoid it drying out before you can place the tiles.
Special Considerations
If large areas of the vinyl are loose, don’t set tile or backer over it. Small loose spots are acceptable and easy to deal with by filling them with thin-set. Also, cushioned sheet vinyl must be removed before setting tile, as it’s too spongy to support the weight. Before removing it, check for asbestos and follow proper procedures if present.
Next, we’ll dive into how to lay ceramic tile in a bathroom, including planning your tile layout and setting the tiles.
How to Lay Ceramic Tile in a Bathroom
Planning Your Tile Layout
Before you start laying ceramic tile in a bathroom, you need a solid plan. A well-thought-out layout ensures a professional look and minimizes waste.
Center Rows
Start by finding the center of your bathroom floor. Use a tape measure to mark the center points along the length and width of the room. Snap chalk lines to create a cross at the center. This will act as your guide for laying the first tiles.
Full Tiles at Doorways
Aim to place full tiles at key focal points like doorways and along the bathtub or shower. This creates a clean, professional appearance.
Avoid Narrow Tiles
Try to avoid narrow tiles along walls. Ideally, cut tiles should be at least half their original size. This reduces the number of cuts you need to make and makes the layout visually appealing.
Minimizing Cuts
Dry-lay your tiles first to see how they fit. Place tile spacers between them to account for grout lines. Adjust the layout to minimize the number of cuts and avoid difficult shapes.
Setting the Tile
Now that your layout is planned, it’s time to set the tiles.
Trowel Size
Choose the right trowel size based on your tile size. For most ceramic tiles, a 1/4-inch notched trowel works well. The notches help regulate the amount of thin-set mortar applied.
Combing Adhesive
Spread the thin-set mortar over a small section of the floor using the notched side of the trowel. Hold the trowel at a 45-degree angle and comb the adhesive in one direction. This helps release air bubbles and ensures a strong bond.
Pressing and Wiggling Tile
Set each tile into the thin-set. Press down firmly and wiggle it slightly to ensure it embeds well. This step is crucial for preventing tiles from lifting later.
Inspecting Sections
After setting a section of tiles, inspect it carefully. Make sure the tiles are level and the spacers are in place. Wipe off any excess thin-set from the tile surfaces with a damp sponge.
Using Spacers
Tile spacers are essential for maintaining even gaps between tiles. This ensures uniform grout lines and a professional finish.
Setting Perimeter Tiles
Once the main field tiles are set and the thin-set has cured, it’s time to tackle the perimeter tiles.
Cutting Perimeter Tiles
Measure the gaps along the edges and cut the perimeter tiles to fit. Use a wet saw or tile cutter for precise cuts. Always measure twice to avoid mistakes.
Combing Thin-Set
If your trowel is too large for the small perimeter tiles, comb thin-set on the back of each tile before laying it down. This ensures a strong bond.
Caulked Joints
Where perimeter tiles meet fixtures like tubs or walls, leave a small gap for caulk. This caulked joint should be as wide as the grout lines to maintain a uniform look.
With your tiles set, the next step is grouting and sealing to complete your beautiful new bathroom floor.
Grouting and Sealing Your Tiles
Grouting Your Tiles
Grouting is essential to lock your tiles in place and give your bathroom floor a finished look. Here’s how to do it:
Mixing Grout
Start by mixing your grout to a thick, “mashed potato” consistency. Follow the package instructions for the right proportions. Let it sit for a few minutes to allow the chemicals to activate.
Working Grout into Joints
Using a rubber grout float, scoop some grout and place it on the tile surface. Work the grout into the joints by holding the float at a 45-degree angle and moving it diagonally across the tiles. This ensures the grout fills the gaps completely.
Scraping Off Excess Grout
Once the joints are filled, use the grout float to scrape off excess grout. Hold the float at a shallow angle and move it diagonally across the tiles to avoid digging into the joints.
Wiping Off Extra Grout
After about 20 minutes, the grout will start to set. Use a damp sponge to wipe off the extra grout from the tile surfaces. Be gentle to avoid removing grout from the joints. Rinse the sponge often and change the water frequently.
Clean Excess Grout from Tiles
To prevent grout haze, make light passes with a damp sponge diagonally across the tiles. Wring out the sponge thoroughly to avoid adding extra water, which can weaken the grout. Rinse and change the water frequently for best results.
Applying Sealant
Sealing your tiles and grout is crucial for durability and maintenance. Here’s how to apply the sealant:
Porous Tiles
First, determine if your tiles are porous by placing a wet sponge on a tile for a minute. If a dark spot appears, your tile is porous and needs sealing.
Choosing a Sealer
For porous tiles, choose a penetrating sealer. If you prefer not to use a surface film or a high-gloss finish, this is the best option. Solvent sealers are ideal for ceramic or porcelain tiles, while water-based sealers work best for natural stone tiles.
Applying the Sealant
-
Clean the Surface: Vacuum and mop the floor to remove dirt and debris. Scrub the grout to remove any stains and wash off all soap. Let the surface dry for at least 6 hours.
-
Spray the Sealant: Fill a spray bottle with the sealant. Hold it about 15 cm from the surface and spray a thin coat. Let it sit for 5 minutes.
-
Wipe Off Excess: Use a damp sponge to wipe off any excess sealant from the tile surface.
Seal the Grout
Sealing the grout helps prevent stains and keeps mold and mildew at bay. Apply grout sealer using a built-in applicator or a narrow paintbrush. Follow the manufacturer’s instructions for drying time, usually about three days.
Regular Maintenance
Expect to reapply the grout sealer every one to two years. You’ll know it’s time to reseal when water no longer beads on the grout and starts to soak in.
With your tiles grouted and sealed, your bathroom floor will not only look stunning but also stand the test of time. Next, we’ll address some frequently asked questions to help you perfect your tile installation.
Frequently Asked Questions about Laying Ceramic Tile in a Bathroom
What is the 3-4-5 Rule for Laying Tile?
The 3-4-5 rule is a simple, foolproof method to ensure your tile layout is square. This rule is based on the Pythagorean theorem, which states that in a right triangle, the square of the hypotenuse (the side opposite the right angle) is equal to the sum of the squares of the other two sides.
Here’s how to use it:
- Measure 3 feet from one corner along one wall and make a mark.
- Measure 4 feet from the same corner along the adjacent wall and make another mark.
- Measure the distance between the two marks. It should be exactly 5 feet if your corner is square.
If the distance is not 5 feet, adjust your layout until it is. This ensures your tiles will be aligned properly, preventing any skewed or misaligned tiles.
What Do You Put Under Bathroom Ceramic Tile Floor?
Under ceramic tiles in a bathroom, it’s crucial to have a solid foundation. Here’s what you need:
-
Cement-Based Backer Board: This is a moisture-resistant underlayment that provides a firm, stable base for your tiles. It prevents the tiles from cracking due to movement or moisture.
-
Installation Tip: Secure the backer board to the subfloor with backer board screws, spacing them every 8 inches.
-
Thin-Set Mortar: This adhesive is used to bond the tiles to the backer board. It’s essential to mix it to the right consistency and apply it evenly.
-
Tip: Use a notched trowel to spread the thin-set in straight lines. This helps ensure a strong bond between the tiles and the backer board.
Should I Tile Under or Around the Toilet?
When it comes to tiling around the toilet, the best practice is to remove the toilet and tile underneath it. Here’s why:
-
Seamless Look: Tiling under the toilet creates a cleaner, more professional look. It eliminates the need for awkward cuts around the toilet base.
-
Future-Proofing: If you ever need to replace the toilet or install a different model, you won’t have to worry about matching the tile cuts to the new toilet’s footprint.
Steps to Tile Under the Toilet:
-
Remove the Toilet: Turn off the water supply, flush to empty the tank, and disconnect the water line. Unscrew the bolts and lift the toilet off. Place a rag in the sewer pipe to block gases.
-
Tile the Floor: Lay your tiles as usual, extending them into the area where the toilet will sit. Leave a small gap around the sewer pipe for the toilet flange.
-
Reinstall the Toilet: Once the tiles are set and grouted, install a new wax ring on the toilet flange and replace the toilet. Secure it with bolts and reconnect the water supply.
By following these guidelines, you’ll ensure a seamless and durable tile installation in your bathroom. Next, we’ll dive into the common challenges and expert tips for perfecting your tile project.
Conclusion
Changing your bathroom with ceramic tiles is a rewarding project that combines beauty and durability. With the right tools and a step-by-step approach, anyone can achieve a professional finish.
At Aqua Gleam Bathrooms, we pride ourselves on delivering high-quality workmanship and meticulous attention to detail. Whether it’s ensuring accurate measurements, aligning tiles perfectly, or applying grout with precision, every step matters in creating a stunning bathroom.
Recap:
1. Preparation: Start with a solid foundation by removing old tiles and assessing your subfloor.
2. Tools and Materials: Gather all essential tools and materials before starting.
3. Tile Layout: Plan your layout carefully to avoid narrow cuts and ensure a balanced look.
4. Setting Tiles: Use the right techniques to set tiles firmly and evenly.
5. Grouting and Sealing: Finish with proper grouting and sealing to protect your work.
Why Choose Aqua Gleam Bathrooms?
Our team is dedicated to changing your space with precision and care. We understand that the beauty of a bathroom lies in the details, from the expertly grouted tiles to the seamless installation of fixtures. Trust us to bring your vision to life with our expertise and commitment to excellence.
Ready to transform your bathroom? Visit our service page and let’s get started on your dream bathroom today!
Thank you for choosing Aqua Gleam Bathrooms. We look forward to helping you create a space that is both beautiful and functional.