Introduction
Importance of Bathroom Flooring
Have you ever stopped to think about the impact of your bathroom flooring on the overall aesthetic and efficiency of your space? No? Well, we at Aqua Gleam Bathrooms have, and we can tell you that it makes a world of difference. From porcelain tiles, marble, to vinyl, every choice you make when it comes to your bathroom floor influences not only the appearance but also the functional aspects of your space. In particular, durability, water resistance, and easy maintenance are factors you can’t ignore when selecting your bathroom flooring.
Why You Might Need to Replace Your Bathroom Floor
However, like all things, even the best bathroom flooring wears out over time. You may start noticing tiles chipping off, laminate peeling, or simple wear and tear that diminishes the attractive appeal of your bathroom. Or perhaps, the outdated style of your current bathroom floor is no longer appealing. If you’ve begun to notice any of these factors, you’re likely already considering installing a new bathroom floor.
Here’s the good news: while installing a new bathroom floor might sound like a mountainous task, it doesn’t have to be. It can be quite a manageable, rewarding DIY project that ends up revolutionizing your space, if done right.
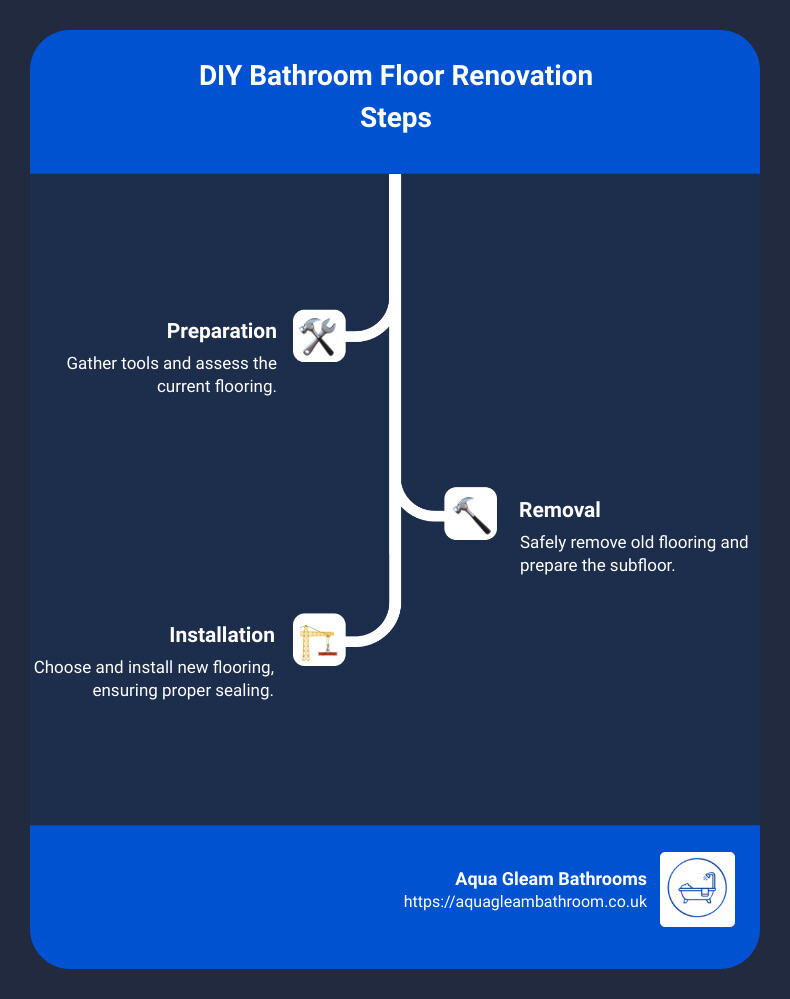
To guide you through the process of installing a new bathroom floor, we’ve boiled it down to a few simple steps:
1. Gather necessary materials and tools: This will vary depending on the type of flooring you choose. General supplies often include new flooring, underlayment, adhesive or mortar, grout, sealant, cutting tools, notched trowel, grout float, and cleaning supplies.
2. Remove old flooring: This process will differ based on the type of flooring you’re removing. Some require chiseling off, others peeling or prying up.
3. Check for underlying issues: After removing old flooring, examine the subfloor for any damage or unevenness that needs addressing before installing new flooring.
4. Choose and install new flooring: Make your choice based on durability, aesthetics, budget, and environmental impact. Once decided, proceed with the corresponding installation process.
We’ll delve into more detail, remove the guesswork, and make installing new bathroom floor a realizable dream for you. So buckle up, and let’s get to work!
Preparing for the Project
Any successful home improvement project begins with thorough preparation. When it comes to installing a new bathroom floor, there are several steps you need to take before you can start laying tiles or planks.
Gathering Necessary Materials and Tools
First things first, gather all the necessary materials and tools. What you’ll need will largely depend on the type of flooring you’ve chosen to install. For most bathroom flooring projects, the following supplies will be required:
- New flooring (e.g. tile, vinyl, laminate)
- Underlayment (if required)
- Adhesive or mortar (if necessary)
- Grout (if using tile)
- Sealant (if using wood)
- Cutting tools (e.g. saw, tile cutter)
- Notched trowel (if using adhesive or mortar)
- Grout float (if using tile)
- Sponges and cleaning supplies
Having these tools and materials at hand before you start will make the process smoother and more efficient.
Assessing the Current Bathroom Floor
Next, remove the old flooring to assess the condition of the subfloor. Look out for any signs of water damage, unevenness, or other potential issues that may need to be addressed before proceeding. If you notice water damage, address the source of the leak immediately. Uneven subfloors may need to be leveled using a self-leveling compound. If the subfloor is in good condition, you can move on to the next step.
Estimating the Cost of the Project
Budgeting is another important aspect of project preparation. Take into account the cost of materials, tools, and professional installation if required. Keep in mind that while DIY can save on labor costs, incorrect installation can lead to costly repairs down the line.
At Aqua Gleam Bathrooms, we help you plan your project, provide a detailed installation quote, and ensure that everything is perfectly planned and prepared before installation begins. We also help you book your delivery and installation dates and keep in touch between delivery and installation to make sure everything is on track.
The goal is to create a beautiful and functional space that adds value to your home. With careful planning and the right tools, you’ll be well on your way to successfully installing a new bathroom floor.
Removing the Old Flooring
Before you can start installing your new bathroom floor, the old flooring needs to be removed. The process varies depending on the type of flooring you currently have.
How to Remove Tile Flooring
Removing tile flooring can be a bit of a challenge. To do this, you’ll need a hammer and a chisel. Begin by scoring the grout lines with the chisel. Then, use the hammer to gently tap the chisel, loosening the tiles. Once the tiles are loose, they should be easy to lift off the floor. If you encounter any difficulties, a tile removal tool or a floor scraper can be of great help.
How to Remove Vinyl Flooring
To remove vinyl flooring, start by removing any trim or baseboards around the edges of the room. Then, use a utility knife to cut the vinyl into small sections and peel it up from the floor. If the vinyl proves stubborn, a heat gun can be used to soften the adhesive and make the removal process easier.
How to Remove Laminate Flooring
When removing laminate flooring, you’ll need to take out the planks one by one. Begin by removing the baseboard trim and any quarter-round molding. Then, use a pry bar to lift the planks.
Checking and Preparing the Subfloor
After the old flooring is removed, it’s crucial to check the subfloor for any underlying issues. Look for any signs of water damage or uneven areas. If you discover water damage, it’s necessary to fix the source of the leak before proceeding with the installation of the new flooring. For uneven subfloors, use a self-leveling compound to create a smooth, even surface.
When we at Aqua Gleam Bathrooms assist with your flooring replacement, we ensure that the subfloor is inspected and prepared correctly. This is a crucial step in ensuring that your new bathroom floor is installed correctly and lasts for many years to come.
Now that the old flooring is removed and the subfloor is prepared, you’re ready to move on to the exciting part — installing your new bathroom floor! In the next section, we’ll guide you through choosing and installing your new flooring.
Choosing and Installing the New Flooring
When it comes to installing a new bathroom floor, there are several different flooring options available. Each one comes with its own unique set of characteristics and installation steps. Choosing the right one depends on your personal taste, budget, and the specific needs of your bathroom.
Overview of Different Flooring Options
There are several flooring options suitable for bathrooms, each offering a range of styles and benefits. Here are a few popular choices:
- Tile: Tile is a traditional choice for bathroom floors, especially ceramic and porcelain, known for their water resistance and durability. Tiles also allow for a wide range of aesthetics, from simple to ornate patterns.
- Vinyl: Vinyl is a budget-friendly option that is easy to install and maintain. It is highly water-resistant and comes in a variety of styles, including options that mimic the look of wood or stone.
- Laminate: While not as water-resistant as tile or vinyl, laminate can still be a good choice for bathrooms if it’s properly sealed. Laminate flooring is easy to install and comes in a wide range of designs.
When choosing your flooring, consider not only the look and feel but also factors such as durability, maintenance, and environmental impact. You can find more detailed information about these considerations in our Bathroom Flooring Ideas blog post.
How to Install Tile Flooring
Tile is a classic choice for bathroom flooring, and while it requires some patience and precision, it’s a project you can definitely tackle yourself. Here’s a simple step-by-step guide:
- Prepare the subfloor by ensuring it’s clean, dry, and level.
- Lay out your tiles in your chosen pattern, making any necessary cuts with a tile cutter.
- Apply adhesive or mortar to the subfloor using a notched trowel.
- Carefully lay your tiles, using spacers to ensure even grout lines.
- Allow the tiles to set for the time recommended by the adhesive manufacturer.
- Mix and apply grout to the joints, using a grout float to press it into the spaces.
- Wipe away the excess grout with a damp sponge, rinsing regularly.
- Allow the grout to dry, then apply a sealer if recommended by the grout manufacturer.
How to Install Vinyl Flooring
Vinyl flooring is an excellent choice for those seeking a cost-effective, easy-to-install option. Here’s how you can install it:
- Prepare your subfloor by ensuring it’s clean, dry, and level.
- Measure and cut your vinyl to fit your bathroom, accounting for any obstacles like toilets or vanities.
- Apply adhesive to the subfloor (if using glue-down vinyl).
- Carefully lay your vinyl, pressing down firmly to ensure good adhesion and to remove any air bubbles.
- Use a roller to further secure the vinyl and ensure a smooth surface.
- Replace any trim or baseboards you removed during the prep phase.
How to Install Laminate Flooring
Laminate flooring is another option that, while requiring a bit more care in a bathroom setting, can offer a beautiful look. Here’s how to install it:
- Ensure your subfloor is clean, level, and dry.
- Install an underlayment if required by the manufacturer.
- Begin laying your laminate planks, snapping them together according to the manufacturer’s instructions and staggering the joints for a natural look.
- Use a saw to cut planks to fit around obstacles or at the end of rows.
- Replace any baseboards or trim you removed during the prep phase.
The key to a successful floor installation is preparation. Before you start installing your new bathroom floor, make sure you have all the necessary tools and materials, and that your subfloor is ready to go. If you need any further advice or installation services, don’t hesitate to contact us.
Special Considerations for Bathroom Flooring Installation
When you’re installing new bathroom floor, there are a few specific aspects you need to consider. These include accommodating for bathroom fixtures, correctly sealing and grouting the floor, and allowing sufficient time for the floor to cure.
Working Around Obstacles Like Toilets and Vanities
We don’t always have a blank canvas to work with when installing bathroom flooring. Often, there are existing fixtures such as toilets, vanities, or bathtubs to work around.
For a seamless finish, it’s best to create a paper template of the necessary tile shape. This can be done by cutting a piece of paper to the same size as a whole tile, then cutting a series of slits along the edge where the paper tile touches the base of your obstacle. Once the template is ready, you can transfer the cut line to the actual tile using an indelible marker.
Remember to remove small chunks at a time using a tile nipper, working your way towards the marked line. Once you reach the scribed line, smooth off the edges using a tile file or fine grade sandpaper. Then, the cut tile can be fitted into place.
Sealing and Grouting the Floor
After the tiles are laid and the adhesive is dry, the next step is grouting. Grout not only fills the gaps between the tiles but also helps keep them in place.
Start by cleaning the surface of the tiles and making sure no tile spacers are sticking up. Apply a small amount of grout to the tiles, using a grouting float to work it into the joints. Once you’ve grouted several rows, run a grout finishing tool along the joints for a smooth finish.
After the grout has dried, it’s important to seal the edges of your new tiled floor. This can be done by placing strips of masking tape around the edge of the floor and the base of the wall, then applying a suitable sealant. A shaping tool can help give the sealant a smooth finish.
Letting the Floor Cure Before Use
The final step in installing a new bathroom floor is often overlooked, but it’s critical – letting the floor cure before use.
After grouting and sealing, it’s best to avoid using the floor for at least 24 hours. This allows the adhesive, grout, and sealant to fully harden, ensuring a durable and long-lasting finish.
While this process might seem daunting, we at Aqua Gleam Bathrooms are here to help. With years of experience and a team of professionals, we can help you navigate these special considerations and ensure your bathroom flooring installation goes smoothly.
Maintaining Your New Bathroom Floor
After successfully installing your new bathroom floor, ensuring its longevity is crucial. With proper maintenance, you can keep your floor looking fresh and new for years to come. Here are some tips to help you maintain your bathroom floor.
Cleaning and Care Tips for Different Flooring Types
The way you clean your bathroom floor depends on the type of flooring material used. For instance, tile floors should be cleaned with a mild detergent and warm water. Make sure to rinse the floor thoroughly to avoid leaving a film of detergent. For stubborn grime, a soft brush can be used to scrub the tiles gently.
On the other hand, vinyl and laminate floors can be maintained by regular sweeping or vacuuming. Avoid using abrasive cleaners or scrubbing tools as they can scratch and damage the surface. When mopping, use a damp mop instead of a soaking wet one to prevent water from seeping into the seams.
In all cases, make sure to wipe spills immediately to prevent stains and potential water damage. Regular cleaning not only preserves the appearance of your floor but also reduces the chances of slip-and-fall accidents due to accumulation of grime or soap residue.
When to Re-seal or Re-grout Your Floor
Re-sealing and re-grouting are essential steps in maintaining the durability and aesthetic appeal of your bathroom floor, especially if you have a tile floor. Sealant and grout can degrade over time due to exposure to water and cleaning agents.
Grout should be sealed after installation and then re-sealed once every year or two, depending on the level of traffic in your bathroom. Sealing grout helps to prevent moisture penetration, which can lead to mold growth and tile loosening.
Similarly, if you notice the sealant around the edges of your floor wearing off, it’s time to re-seal. This is especially important in wet areas around the bathtub or shower.
In case you notice loose or chipped tiles, it’s recommended to replace and re-grout them promptly. Having extra tiles from your initial installation can be useful in such instances.
Maintaining your new bathroom floor is an ongoing commitment. However, with regular care and attention, you can enjoy the beauty and functionality of your new floor for many years. At Aqua Gleam Bathrooms, we are proud to provide quality installation services and expert advice to help you maintain your bathroom floor in top condition.

Conclusion
Recap of the Installation Process
We’ve covered all the steps involved in installing a new bathroom floor, from assessing your current floor and gathering necessary materials and tools to removing the old flooring and choosing and installing the new one. We’ve also provided guidance on how to work around common bathroom obstacles and the importance of proper sealing, grouting and curing time for your new floor.
The Impact of a New Bathroom Floor on Your Space
It’s important to remember the significant impact that a new bathroom floor can have on your space. It can transform your bathroom from outdated to modern, enhance the sense of space with large format tiles, or add a touch of elegance with marble flooring. The right flooring can significantly influence the overall aesthetic and functionality of your bathroom, making it not just a practical space, but a personal oasis.
Encouragement for DIY Home Improvement Projects
While installing new bathroom floor may seem daunting, it’s an entirely achievable project for many homeowners. With the right tools, materials, and a good understanding of the process, you can successfully revamp your bathroom and enjoy the satisfaction of a job well done. Though, that professional help is always available if you need it.
At Aqua Gleam Bathrooms, we offer a range of services to support you in your home improvement journey. Whether you’re considering a full bathroom remodel, or simply need advice on maintaining your new floor, we’re here to help.
For more information on bathroom installation, check out our detailed guide on installing a bath and our expert tips for perfect kitchen and bathroom installations.
Every home improvement project you undertake adds value to your home and enhances your living space. So go ahead and take that first step towards revamping your bathroom.