

When you’re searching for how to build a walk-in shower, the most straightforward answer involves: planning your space, choosing the right materials, getting the necessary tools, and understanding the steps involved in construction. These include framing, waterproofing, tiling, and installing shower fixtures. Budgeting plays a crucial role as well because costs can vary widely based on materials, size, and whether you’re doing it yourself or hiring professionals.
Building a walk-in shower can transform your bathroom from a functional space into a spa-like retreat while potentially increasing your home’s value. However, diving into such a project requires a clear plan and budget. Start with assessing the available space in your bathroom, and decide on the size and placement of your new shower. Next, consider the materials you love and those that fit within your budget. Choosing the right tools and materials from the start can save both time and money down the line.
Whether you’re a seasoned DIY enthusiast or a homeowner ready to tackle your first major project, the journey toward installing a walk-in shower involves careful preparation and attention to detail. From the demolition of any existing structures to the final touches on your new shower, each step poses its own set of challenges and rewards.
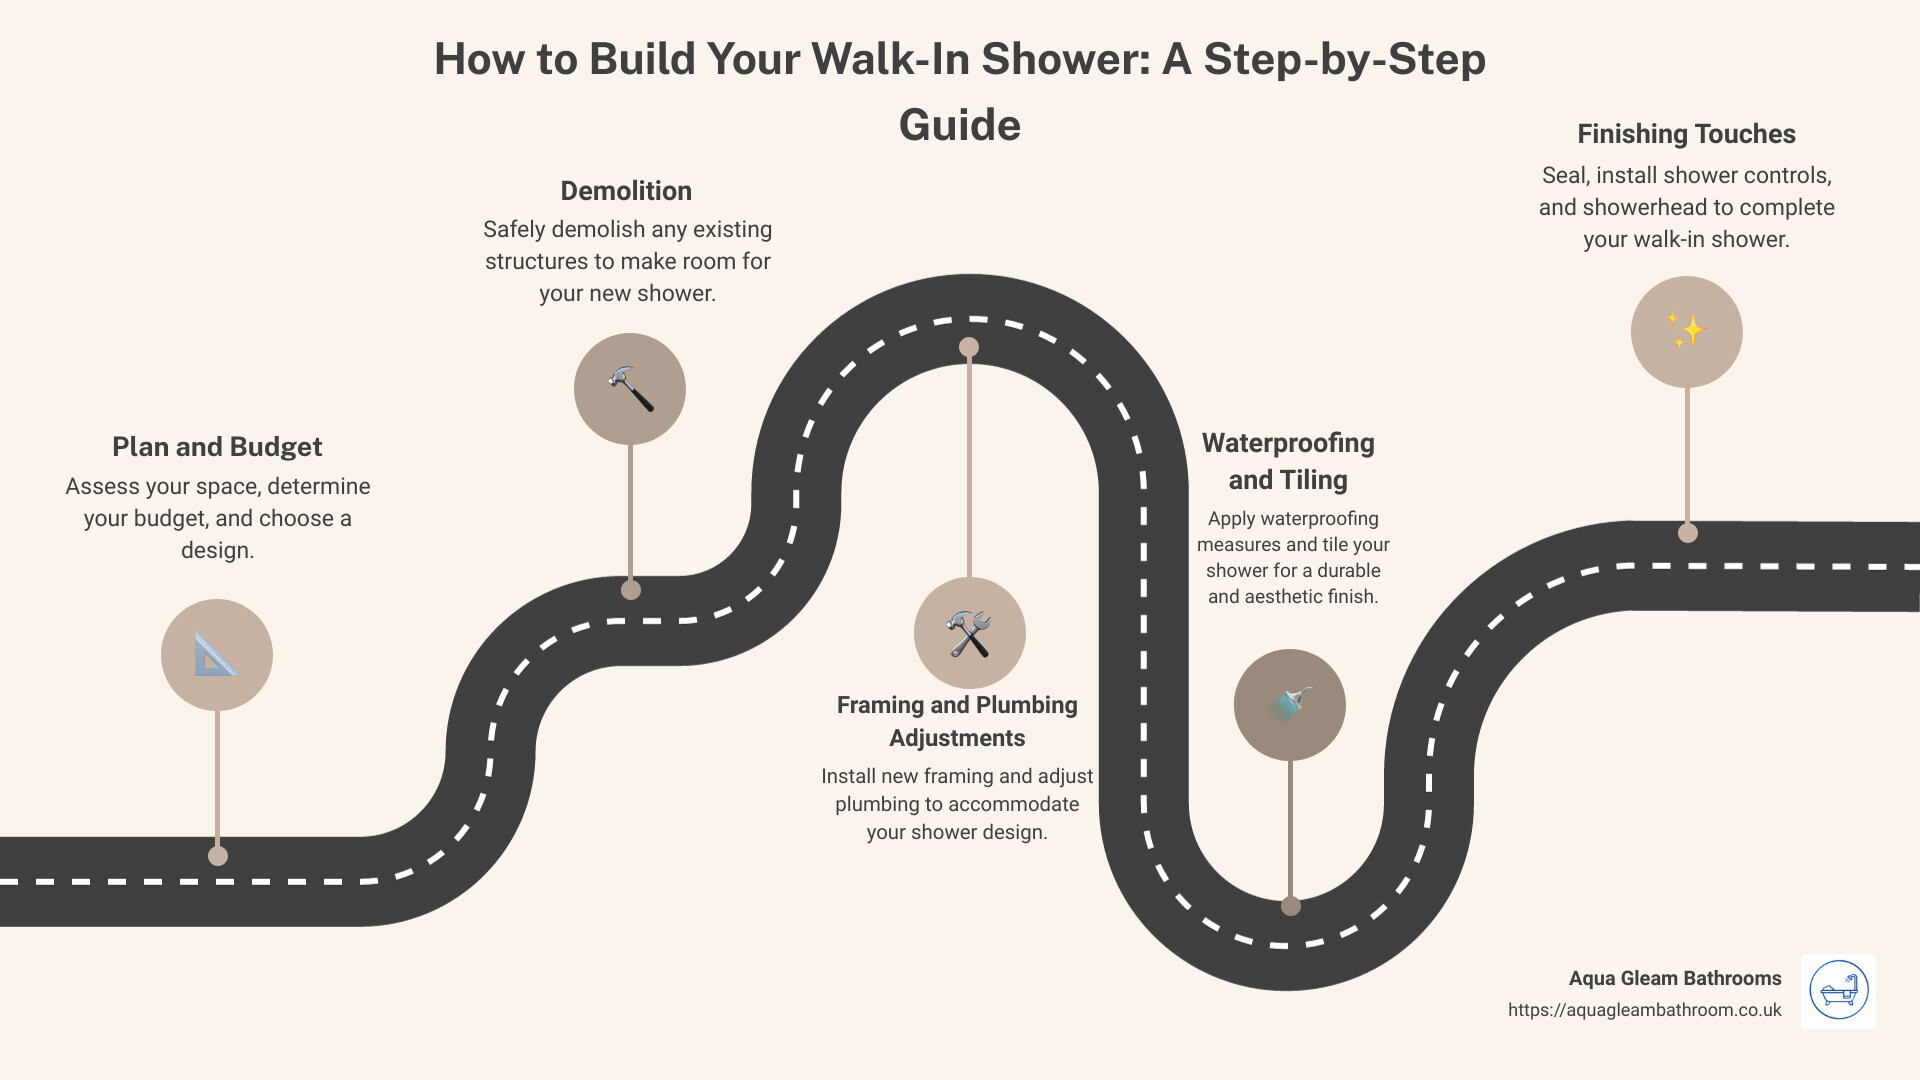
Simple and straightforward guidance can help ensure your project’s success, allowing you to enjoy the rewards of your hard work. Let’s dive into the details of planning, budgeting, and executing your walk-in shower project with precision and care, turning your bathroom into a haven of relaxation and style.
Assessing Your Space
Before you can dive into the exciting journey of how to build a walk-in shower, it’s crucial to take a step back and evaluate the space you’re working with. This stage is about understanding your bathroom’s layout to ensure your walk-in shower not only fits but enhances the room. Let’s break down what you need to consider:
Floor Space
The first thing to look at is how much floor space you have available. Measure the length and width of your bathroom to determine the maximum size your shower can be. You want your shower to improve your bathroom’s functionality, not make it feel cramped.
Clearances
Next, think about clearances. There needs to be enough room for the shower door to open and close easily, without hitting the toilet or vanity. The National Kitchen & Bath Association recommends a minimum of 30 inches of clearance in front of the shower entrance. This ensures ease of movement in and out of the shower.
Shower Location
The location of your shower within the bathroom is another critical factor. Ideally, you want to place it in a corner or along one wall to maximize space. However, you also need to consider existing plumbing. Moving water supply and drainage lines can be costly, so if you’re working on a tight budget, try to work with your bathroom’s current plumbing layout.
Plumbing Adjustments
If your dream shower can’t be realized without some plumbing adjustments, don’t fret. Sometimes, moving a few pipes can open up a range of possibilities for shower placement and size. Just be sure to consult with a professional plumber to understand the scope and cost of these changes.
In assessing your space, you’re laying the groundwork for a successful walk-in shower installation. By carefully considering floor space, clearances, and shower location, you’re ensuring that your new shower will not only fit seamlessly into your bathroom but also enhance its overall functionality and style.
With the space properly assessed, you’re now ready to move on to the exciting part: selecting the tools and materials you’ll need to bring your walk-in shower to life.
Essential Tools and Materials
Building a walk-in shower from scratch is like putting together a puzzle. You need the right pieces and know-how to fit them together. Let’s break down what you’ll need.
Demolition Tools
First off, you’re going to need tools to tear out your old shower or make space for the new one. This includes:
- Hammer and prybar for removing old fixtures and tiles.
- Safety gear like gloves, goggles, and dust masks to protect yourself during the process.
Tile Saw
Tiles don’t always fit perfectly into your space. A tile saw helps you cut them to the right size. Measure twice, cut once!
Drill/Driver
This tool is essential for securing cement boards and installing the showerhead and controls. A drill/driver will be your best friend for anything that requires screws.
Trowel and Grout Float
- A trowel is used to spread thinset or mortar on the walls or floor.
- A grout float helps evenly distribute grout between your tiles, ensuring a smooth finish.
Cement Board
Your shower walls need a solid, water-resistant base. Cement board is a great choice because it doesn’t rot, warp, or degrade in wet environments.
Waterproofing
This is crucial. You can use a liquid membrane or a sheet membrane (like Schluter Systems) to prevent water from seeping into walls and floors. Proper waterproofing is the key to a mold-free bathroom.
Thinset/Mortar
You’ll need thinset or mortar to adhere your tiles to the walls and floor. Make sure to choose a type suitable for wet areas.
Tiles
Tiles are the face of your shower. Whether you choose ceramic, porcelain, or slate tiles, pick ones that match your style and are practical (think slip-resistant).
Grout
Grout fills the spaces between tiles. It comes in various colors to complement or contrast your tiles. For showers, consider using a grout with mold and mildew inhibitors.
Silicone Sealant
Finally, silicone sealant is used to waterproof edges and seams where the tile meets the shower pan, walls, or fixtures. It’s your last line of defense against water damage.

Gathering these tools and materials is the first step in how to build a walk-in shower. Each plays a vital role in ensuring your shower is not only beautiful but also functional and durable. With everything in hand, you’re ready to start the installation process, transforming your bathroom into a spa-like retreat.
Next, we’ll dive into the step-by-step installation guide, where I’ll walk you through preparing the area, building the shower pan, waterproofing, tiling, and adding those finishing touches.
Step-by-Step Installation Guide
Preparing the Area
First, clear out the old shower or the space where your new walk-in shower will go. This means demolition. Get your gloves, goggles, and tools ready. Remove any existing tiles, fixtures, and shower parts. It’s messy, but necessary.
After the area is cleared, check your framing. Make sure it’s solid and can support your new shower. Adjustments might be needed to ensure everything is level and sturdy.
Building the Shower Pan and Drainage
Selecting the right shower pan is crucial. It’s the base of your shower, and it needs to fit your space perfectly. If you’re going custom, make sure it’s properly sized.
Installing the drain comes next. Position it at the center or wherever your design dictates. Water must flow towards the drain, so sloping your shower floor is a must. This can be done with mortar, creating a gentle slope towards the drain.
Waterproofing Your Walk-In Shower
Waterproofing is non-negotiable. You don’t want leaks. Schluter Systems offer a great solution with their waterproofing membrane. Alternatively, a liquid waterproofing membrane can be applied directly to your cement board walls. Don’t forget to cover seams with waterproofing tape to seal everything tight.
Tiling Your Walk-In Shower
Choosing tiles can be fun. Look for ones that match your style and are slip-resistant. Cutting tiles might be needed to fit your space perfectly. Be patient and precise.
Laying tiles starts at the bottom and works up. Use a notched trowel to spread thinset, and place your tiles carefully. After the thinset dries, grout between the tiles. This fills gaps and seals the deal.
Finishing Touches
Sealing your grout and tile edges with silicone caulk will waterproof the critical areas. Now, it’s time for shower controls and showerhead installation. Follow the manufacturer’s instructions closely to ensure everything works perfectly.
And there you have it! Step by step, you’ve built your walk-in shower. Taking your time and doing things right will save you from headaches later. Enjoy your new shower!
Next, let’s talk about keeping all that water where it’s supposed to be, especially if you’re going for a modern, curbless design.
Keeping Water Contained
In modern bathrooms, the elegance and accessibility of curbless showers have become a popular choice. However, the beauty of these designs brings its own set of challenges, especially when it comes to water containment. Let’s dive into how you can keep water from making a great escape from your walk-in shower.
Curbless Showers
The allure of curbless showers lies in their seamless look and the ease of entry and exit they provide. But without a traditional curb, how do you keep the water in? The answer lies in the careful planning of your shower’s floor.
Sloped Floor
The key to a successful curbless shower is a properly sloped floor. The general rule is to aim for a quarter-inch drop per foot of shower floor. This slope guides water towards the drain efficiently. When planning how to build a walk-in shower, ensure that your contractor understands the importance of this slope. It’s a simple concept, but it requires precision during installation.
Trench Drain
A trench drain, also known as a linear drain, can be a game-changer for curbless showers. Positioned at the shower’s entrance or along one wall, a trench drain catches water over a larger area than a traditional round drain. This makes it an excellent ally in water containment. The added bonus? Trench drains can be sleek and stylish, blending beautifully with your shower’s design.
Water Dam
For an extra layer of protection, consider installing a water dam. These low-profile barriers are placed at the shower’s entrance. They’re just high enough to help contain water but low enough to maintain the accessibility of your curbless shower. Water dams are often made of silicone, making them easy to step over or, in some cases, roll over with a wheelchair.
In conclusion, achieving a curbless shower that keeps water contained is all about the details. From the slope of the floor to the choice of drain, and the possible addition of a water dam, each element plays a crucial role. With careful planning and execution, you can enjoy the sleek look of a curbless shower without worrying about water leakage.
Remember that building a walk-in shower is not just about aesthetics; it’s about combining beauty with functionality. Stay tuned for our next section, where we’ll delve into some of the most frequently asked questions about building a walk-in shower.
Frequently Asked Questions about Building a Walk-In Shower
Can I Build My Own Walk-In Shower?
Yes, you can! But, it’s not a simple task. Building a walk-in shower requires a mix of skills, including basic plumbing, tiling, and waterproofing. If you’re comfortable with DIY projects and willing to learn, it’s definitely possible. A well-planned project and the right tools are key. However, if you’re not confident in these areas, hiring a professional might be the best choice to ensure a successful installation.
How Much Does It Cost to Build a Walk-In Shower DIY?
The cost can vary widely, depending on the materials you choose and whether you do the work yourself or hire professionals. On a DIY basis, costs can range from $500 to $3,000 or more. The major expenses include tiles, a shower pan, plumbing materials, and a shower door if you choose to have one. Opting for high-end tiles or adding features like a rainfall showerhead can push the cost higher. It’s crucial to set a budget beforehand and shop around for the best deals on materials.
How Do You Keep Water in a Curbless Shower?
Curbless showers are sleek and accessible, but they do pose a challenge in keeping water contained. Here are some strategies:
– Proper Sloping: The shower floor must slope towards the drain to ensure water flows directly into it. A slope of at least 1/4 inch per foot is standard.
– Trench Drains: These are long, narrow drains placed at the shower entrance or along one side. They catch water effectively and are a stylish option for curbless showers.
– Waterproofing Membrane: A must-have for any walk-in shower, especially curbless ones. It prevents water from seeping into the subfloor.
– Shower Screens: While not a barrier like a traditional curb, a fixed glass panel can help direct water back into the shower area.
Building a walk-in shower can add beauty and functionality to your bathroom. Whether you decide to take on the project yourself or hire professionals, careful planning and budgeting are essential. With the right approach, you can create a shower that meets your needs and enhances your daily routine. Stay tuned for our conclusion, where we’ll review key points and offer maintenance tips to ensure your new walk-in shower from Aqua Gleam Bathrooms stays looking great for years to come.
Conclusion
Congratulations! You’ve taken a significant journey on how to build a walk-in shower. From assessing your space to the finishing touches, we’ve covered the essential steps to help you transform your bathroom into a functional and stylish sanctuary. Let’s briefly review the key points and discuss some maintenance tips to keep your new walk-in shower in top condition.
Review
- Planning and Budgeting: Always start with a clear plan and budget. It ensures that your project aligns with your expectations and financial capabilities.
- Essential Tools and Materials: Gathering the right tools and materials before you start your project is crucial. It helps in avoiding delays.
- Step-by-Step Installation Guide: Following a structured guide, like the one we’ve provided, simplifies the process and helps avoid common pitfalls.
- Keeping Water Contained: Choosing the right type of shower, whether curbless or with a curb, and ensuring proper slope and drainage are vital to prevent water leakage.
Maintenance Tips
To ensure your walk-in shower remains a retreat for relaxation and not a source of stress due to maintenance issues, consider these tips:
- Regular Cleaning: Use a squeegee after each use to minimize water spots and mildew growth. Weekly, clean the tiles and glass with a mild cleaner to keep them sparkling.
- Check Seals and Grout: Periodically inspect the silicone sealant and grout lines for any signs of wear or damage. Promptly repair any areas to prevent water damage.
- Avoid Harsh Chemicals: Harsh chemicals can damage the finish of your tiles and fixtures. Stick to mild, non-abrasive cleaners to keep your shower looking new.
Aqua Gleam Bathrooms
At Aqua Gleam Bathrooms, we understand that building a walk-in shower is more than just a renovation project; it’s about creating a space that reflects your style and meets your functional needs. Whether you’re looking for a luxurious rainfall showerhead or a practical and stylish shower seat, we’re here to help. Our team of experts is dedicated to providing you with the best solutions and services to make your dream bathroom a reality.
Building a walk-in shower can significantly enhance your bathroom’s functionality and aesthetic appeal. By following our guide and utilizing the services offered by Aqua Gleam Bathrooms, you can ensure that your walk-in shower not only looks great but also stands the test of time. A well-planned and executed walk-in shower can offer you a daily dose of luxury and relaxation. Happy building!
For more information, tips, or to schedule a consultation, don’t hesitate to reach out to us. Let Aqua Gleam Bathrooms help you create the bathroom of your dreams.